Yo, folks! I'm here as a supplier of Vacuum Lifters, and today I wanna talk about something super important: how to replace the suction cups of a vacuum lifter. It might seem like a complicated task at first, but trust me, with a bit of guidance, you'll be doing it like a pro in no time.
Why Replace the Suction Cups?
First off, you might be wondering why you need to replace the suction cups in the first place. Well, over time, these suction cups go through a lot of wear and tear. They're constantly sticking to different surfaces, getting pulled off, and dealing with all sorts of environmental factors. As they age, their ability to create a strong vacuum seal diminishes. This could lead to a whole bunch of issues, like reduced lifting capacity or even worse, the load slipping during lifting, which is a major safety hazard. So, regularly checking and replacing the suction cups is crucial to keep your vacuum lifter working safely and efficiently.
Tools You'll Need
Before you dive into the replacement process, let's gather the necessary tools. You won't need a whole workshop full of fancy equipment, just a few basic things. You'll need a wrench, which might come in different sizes depending on your vacuum lifter model. A screwdriver can also be handy, especially if there are any screws holding the suction cups in place. And of course, make sure you have the new suction cups ready. You can find high - quality Large Glass Lifting Suction Cups on our website. These are designed to provide a strong grip and are made to last.
Step - by - Step Replacement Process
Step 1: Safety First
The first and most important step is always safety. Make sure the vacuum lifter is turned off and disconnected from its power source. You don't want any accidental starts while you're working on it. Also, if the lifter has any load on it, remove the load carefully to avoid any injuries.
Step 2: Locate the Suction Cups
Next, you need to find where the suction cups are attached to the vacuum lifter. In most cases, they're located at the bottom or the lifting surface of the lifter. Some models might have multiple suction cups arranged in a specific pattern. Take a good look at how they're attached and note down any details, like if there are any clips, screws, or bolts holding them in place.
Step 3: Remove the Old Suction Cups
Now it's time to get rid of the old suction cups. If they're held in place by screws, use your screwdriver to carefully remove the screws. If there are clips, you can use your fingers or a small tool to release them. Once the fasteners are removed, gently pull the old suction cup away from the lifter. Be careful not to damage the mounting area on the lifter while doing this. Sometimes, the old suction cup might be stuck due to dirt or debris. In that case, you can use a soft brush to clean the area around the suction cup before attempting to remove it again.
Step 4: Clean the Mounting Area
After removing the old suction cups, the mounting area on the vacuum lifter might be dirty or have some residue from the old cups. Use a clean cloth and a mild cleaning solution to wipe the area clean. Make sure there's no dirt, dust, or grease left, as this can affect the performance of the new suction cups. A clean surface will ensure a better seal and a stronger attachment.
Step 5: Install the New Suction Cups
Take your new suction cup and place it on the mounting area. Make sure it's properly aligned with the holes or the attachment points on the lifter. If there are screws, insert them through the holes in the suction cup and into the lifter, and then tighten them using your screwdriver. If it's a clip - on type, carefully snap the new suction cup into place. Make sure it's securely attached and there's no wiggling or looseness.
Step 6: Test the New Suction Cups
Once you've installed all the new suction cups, it's time to test them. Reconnect the vacuum lifter to its power source and turn it on. Place a small, non - valuable object on the suction cups and see if the lifter can hold it securely. Check for any signs of air leakage around the suction cups. If the object doesn't stay in place or if you can hear air hissing, there might be an issue with the installation. Double - check the alignment and the tightness of the fasteners.
Different Types of Vacuum Lifters and Suction Cups
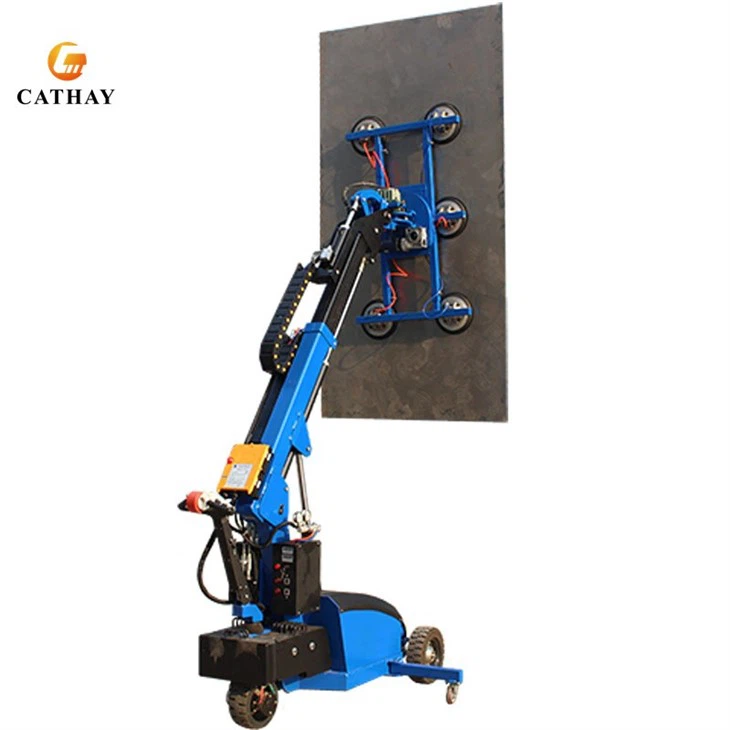
There are various types of vacuum lifters out there, and each might have a slightly different way of attaching and replacing the suction cups. For example, Mobile Glass Lifter is designed specifically for lifting glass panels. These lifters often have suction cups with a special shape and material to provide a better grip on smooth glass surfaces. The replacement process for these suction cups is similar to the general process we've discussed, but you need to be extra careful when handling them as they're usually more delicate.
On the other hand, Suction Cup Vacuum Lifter is a more general - purpose lifter that can be used for different types of materials. The suction cups on this type of lifter might be more robust and easier to replace. However, it's still important to follow the correct procedure to ensure optimal performance.
Tips for Maintaining Your Suction Cups
Replacing the suction cups is just one part of keeping your vacuum lifter in top shape. Here are some tips for maintaining the suction cups between replacements:
- Regular Cleaning: Clean the suction cups regularly to remove any dirt, dust, or debris. This will help them maintain a good seal.
- Inspect for Damage: Check the suction cups for any signs of cracks, tears, or wear on a regular basis. If you notice any damage, replace the suction cups immediately.
- Store Properly: When the vacuum lifter is not in use, store it in a cool, dry place. This can prevent the suction cups from deteriorating due to extreme temperatures or humidity.
Conclusion
Replacing the suction cups of a vacuum lifter is a task that might seem daunting at first, but with the right tools and a clear understanding of the process, it's definitely doable. By following the steps we've discussed today, you can ensure that your vacuum lifter continues to work safely and efficiently.

If you're in the market for a new Vacuum Lifter or need to replace the suction cups, we're here to help. We offer a wide range of high - quality products, including the ones I've mentioned in this blog. Don't hesitate to reach out to us for more information or to start a procurement discussion. We're always ready to assist you in finding the best solution for your lifting needs.
References
- General knowledge of vacuum lifter maintenance and operation.
- Manufacturer's manuals for various vacuum lifter models.